
close
Choose Your Site
Global
Social Media

Views: 0 Author: Site Editor Publish Time: 2026-07-26 Origin: Site


High-end metallic finishes drive engagement and premium brand perception. However, traditional foiling methods often price out low-volume projects because they require custom metal dies. This barrier prevents many creators from offering luxury embellishments on standard print runs.
Digital print shops and in-house packaging teams need a scalable way to produce foiled assets without ordering custom hardware. They require a flexible process to offer striking metallic deliverables on demand. You need a workflow handling variable designs quickly and reliably.
Enter toner reactive foil. This thermal-chemical solution bridges the gap between expensive traditional stamping and high-end digital finishing. It transforms standard monochrome laser prints into brilliant metallic graphics instantly.
This guide provides a clear framework for evaluating this technology. You will discover if a toner-based foiling workflow meets your production volume, budget, and quality standards. Read on to master the mechanics, select the right hardware, and troubleshoot common implementation failures.
Mechanism: Toner reactive foil bonds exclusively to the plastic polymers in laser printer toner when exposed to specific heat and pressure.
Equipment Reality: Setup ranges from entry-level heated pouch laminators for DIY foil printing to dedicated commercial foil fusers for high-volume alignment.
Ideal Use Case: Best suited for short run foil printing, variable data projects, and low-volume custom packaging prototypes.
Primary Limitation: Not compatible with inkjet prints; requires smooth, uncoated or specifically coated substrates to prevent incomplete transfer (mottling).
Understanding the underlying science behind this process helps operators achieve flawless results. The magic lies in a precise thermal reaction between two distinct materials. Reactive foil contains a specialized, heat-sensitive adhesive layer on its underside. This layer completely ignores bare paper fibers. It only activates and fuses when it makes direct contact with melted carbon and plastic polymers.
Standard monochrome laser printers use toner powder composed primarily of microscopic plastic particles. When you pass a printed sheet through a heat source, the toner re-melts slightly. Simultaneously, the foil's adhesive activates, creating a permanent chemical bond exclusively over the printed areas.
Creating a metallic finish follows a straightforward, linear process. You can execute this sequence quickly once you dial in your settings.
Step 1: Print the target design using a monochrome laser printer. Dense, solid black toner yields the absolute best adhesion.
Step 2: Cut and overlay the laser printer foil directly over the printed graphics, ensuring the dull adhesive side faces down.
Step 3: Pass the stacked materials through a calibrated heat source. This device applies steady heat and pressure to trigger the reaction.
Step 4: Let the sheet cool for a few seconds, then peel away the plastic carrier sheet. The metal finish remains permanently bonded to your design.
Many operators confuse this process with other metallic finishing techniques. We must clarify the technical distinctions. This thermal process requires zero plates, dies, or silk screens. It is fundamentally different from liquid cold foil, which uses a UV-curable adhesive printed via offset presses. It also differs entirely from traditional hot stamping, which relies on heavy mechanical pressure and heated brass dies to physically press foil into the paper. You simply print, heat, and peel.
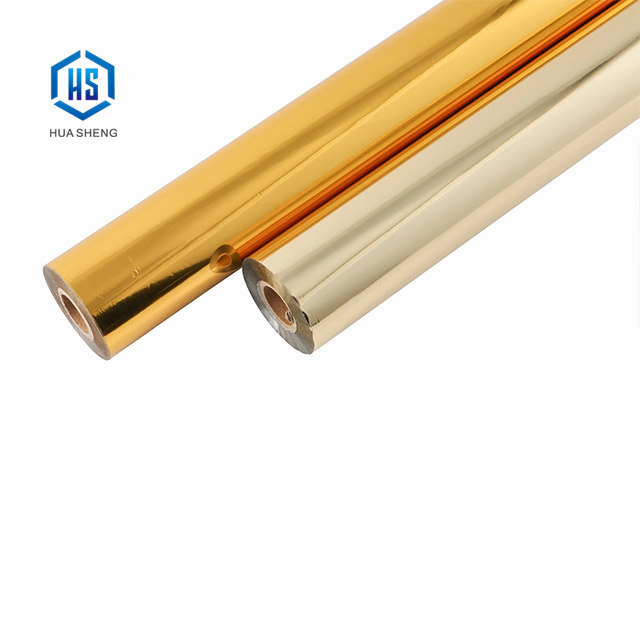
Your hardware choices dictate the consistency, speed, and quality of your output. Operators must match their equipment stack to their operational goals. Scaling from a spare room to a production floor requires entirely different machinery.
Many creators start their journey using accessible, consumer-grade hardware. This setup typically involves standard high-heat pouch laminators and basic monochrome laser printers. If you explore DIY foil printing, you will likely use a 6-roller laminator capable of reaching higher temperatures than standard office models.
Pros: This route offers an incredibly low barrier to entry. It fits easily on a desktop and requires minimal training.
Cons: Consumer laminators suffer from poor heat recovery. If you feed multiple sheets consecutively, the roller temperature drops, causing patchy adhesion. They also apply uneven pressure across wider sheets, leading to edge-to-edge inconsistencies.
Professional environments require absolute reliability. Commercial operations utilize specialized digital foil fusers designed specifically for this thermal process. These robust machines feature heated silicone rollers, adjustable pneumatic pressure controls, and automated web tensioning systems.
Pros: Commercial fusers deliver flawless, edge-to-edge transfer. They prevent wrinkling and support continuous roll feeding, which dramatically reduces manual labor. The heavy-duty heating elements maintain exact temperatures during continuous production.
Cons: These machines require significant capital investment and dedicated floor space. Operators also need targeted training to manage tension and pneumatic settings safely.
Select your equipment based on your strict success criteria. If your goal involves producing consistent, sellable custom packaging, consumer-grade laminators will inevitably fail commercial quality control. Heavy production demands robust heat recovery and perfectly even roller pressure. Conversely, if you only produce occasional short-run greeting cards, a high-end laminator might suffice.
Feature | Prosumer Laminator | Commercial Foil Fuser |
|---|---|---|
Heat Consistency | Drops during continuous feeding | Maintains exact temperature |
Pressure Type | Fixed spring tension | Adjustable pneumatic pressure |
Material Feeding | Manual sheet-by-sheet | Automated continuous roll |
Best Application | Prototyping, hobbyist projects | High-volume commercial runs |
Even the most expensive commercial fuser will produce terrible results if you use the wrong materials. The chemical reaction relies heavily on the physical properties of your printer output and your chosen paper stock.
The foil adhesive explicitly needs melted plastic to anchor itself. This is why toner foil fails completely with inkjet printers. Inkjet devices spray aqueous liquid ink that absorbs deep into the paper fibers, leaving nothing on the surface for the adhesive to grab. Additionally, older wax-based toners or low-density, third-party toner cartridges often lack the necessary polymer concentration. You must emphasize the use of OEM (Original Equipment Manufacturer), high-polymer toner cartridges to guarantee a solid bond.
Your substrate dramatically influences the final aesthetic. Not all cardstock performs equally under high heat and pressure.
Surface Smoothness: Textured papers, such as linen or heavily felted stocks, represent a major risk. The texture creates microscopic valleys. The foil bridges across the peaks of the texture but fails to reach the toner resting in the valleys. This dynamic leads to speckled, incomplete coverage.
Coatings: Glossy or heavily coated stocks often melt when exposed to the fuser's extreme heat. Furthermore, certain chemical coatings actively resist the foil’s adhesive layer. Uncoated, ultra-smooth cardstock remains the gold standard for this industry.
Ambient humidity plays a surprisingly large role in production stability. Paper fibers naturally absorb moisture from the surrounding air. When a damp sheet hits a 300°F fuser roller, that trapped moisture flashes into steam instantly. This rapid expansion causes severe paper curling and unpredictable registration shifts. Store your cardstock in a climate-controlled environment and allow it to acclimatize to the print room before running a job.
Production managers frequently weigh digital foiling against traditional hot stamping. Both methods produce brilliant metallic results, but their underlying economics dictate very different use cases.
Traditional hot stamping carries a significant initial barrier. You must commission a custom metal die—typically machined from brass or magnesium—for every unique design. This process introduces high initial costs and often requires a 3 to 7-day lead time just to acquire the tooling.
Conversely, digital foiling boasts zero setup costs and instant turnaround. You design a file, hit print, and run the sheet through the fuser immediately. This agility makes it the absolute ideal solution for variable data projects. Printing individualized names on hundreds of wedding invitations becomes effortless because you never need to swap out physical metal dies.
We must identify the operational breakeven point. Because it requires no tooling, short run foil printing remains highly cost-effective up to approximately 500 to 1,000 units. If you only need 200 custom packaging sleeves, digital methods win easily.
However, beyond that 1,000-unit threshold, the math flips. Traditional hot stamping presses run much faster than digital fusers. The ultra-low per-impression cost of bulk hot stamping quickly absorbs the initial die cost, making traditional methods superior for massive volume runs.
We must acknowledge visual and tactile limitations. Digital methods sit entirely on the surface of the paper. They do not create the physical, debossed indentation that luxury buyers often associate with traditional hot stamping. Hot stamping physically crushes the paper fibers, leaving a distinct tactile depression. If your project demands that specific debossed texture, digital thermal methods cannot replicate it.
Group variable data jobs together to maximize continuous fuser uptime.
Always calculate the die cost against the digital foil waste cost before quoting a large job.
Set client expectations early regarding the smooth, non-debossed nature of the digital finish.
Operators will inevitably encounter visual defects as they master this process. Diagnosing these issues quickly prevents material waste and missed deadlines. Follow these targeted solutions to correct the most frequent production failures.
You pull away the carrier sheet, but black toner shows through the metallic finish. This incomplete transfer usually stems from three culprits: low toner density, inadequate heat, or microscopic paper textures.
Solution: First, adjust your printer settings to deliver maximum density. If you use a color laser printer, switch to "composite black" (printing cyan, magenta, yellow, and black simultaneously) to build a thicker polymer mound. Next, slow down your fuser speed. A slower pass gives the adhesive more time to reach its activation temperature. Finally, inspect your paper under a loupe to ensure it lacks hidden textures.
Sometimes the metallic layer flakes off and sticks to the blank white paper where no design exists. This messy over-foiling ruins the crisp edges of your artwork. It is primarily caused by excessive fuser heat or ambient toner dust scattered across the page.
Solution: Reduce your fuser temperature by 10 to 15 degrees. Too much heat causes the adhesive to melt uncontrollably and bond with bare paper fibers. Additionally, lightly wipe your printed sheets with a static duster prior to foiling. Laser printers often leave an invisible dusting of stray polymer particles on the page; cleaning the sheet removes this stray adhesive anchor.
You might notice diagonal creases or spiderweb-like wrinkles marring your metallic graphics. This represents a mechanical tension issue, highly prevalent when using continuous rolls on commercial fusers or feeding flimsy sheets into prosumer laminators.
Solution: If you use a basic pouch laminator, always place your project inside a rigid carrier folder. The carrier folder absorbs uneven roller pressure and keeps the paper perfectly flat. If you operate a commercial fuser, adjust your unwinding roller tension. The roll must feed tightly to prevent slack, which inevitably bunches up and causes webbing as it enters the heated nip.
Handling printed areas with bare hands; finger oils resist the foil adhesive.
Using economy replacement toner cartridges instead of OEM brands.
Storing rolls near heating vents, which degrades the heat-sensitive adhesive layer prematurely.
Toner reactive foil radically democratizes metallic finishing across the print industry. It allows bold brands and independent creators to execute brilliant, high-end designs without navigating minimum order quantities or investing in expensive custom dies. You can now transform standard digital prints into premium deliverables in a matter of seconds.
For operations evaluating this technology, strategic testing remains critical. Prioritize testing your specific laser printer output and your chosen ultra-smooth cardstock before you overhaul your workflow. Validating your exact material combination saves immense frustration down the line.
Take action today to upgrade your print capabilities. Request material sample kits from trusted suppliers. Review commercial foil fuser spec sheets to understand space and power requirements. Finally, audit your current laser printer's toner formulation to ensure it packs the high polymer density required for flawless adhesion.
A: No. The foil specifically requires the plastic polymers found in laser toner to melt and act as an adhesive. Inkjet ink absorbs entirely into the paper fibers and leaves absolutely nothing on the surface for the metallic layer to bond to.
A: HTV is used primarily for apparel and fabrics. It requires a vinyl cutter to shape the design and a heavy heat press to apply it. Digital foiling is strictly designed for paper and cardstock substrates, relying entirely on printed toner patterns for adhesion rather than cut vinyl.
A: Generally, paper treated with this process can be recycled similarly to standard printed paper. The microscopic metallic layer separates easily from the paper fibers during the standard repulping process. However, local recycling facility capabilities do vary, so verification helps.
A: Patchy results typically stem from three main issues: low-density toner coverage, using textured paper that creates gaps, or insufficient fuser temperature. Upgrading to ultra-smooth cardstock, maximizing printer density, and slowing the heat-pass speed typically resolves these imperfections immediately.


