
close
Choose Your Site
Global
Social Media

Views: 0 Author: Site Editor Publish Time: 2026-08-18 Origin: Site


Achieving a stark, opaque white on dark, textured, or non-porous substrates creates immediate production headaches. Traditional liquid inks often fall short when hitting deep black papers or slick plastics. Applying multiple screen-printing passes demands excessive drying time. This process inevitably drives up operational overhead. You need a single-pass solution to keep production moving. You must do this without sacrificing visual density or edge crispness. This guide explores the technical realities of using solid color layers for complete surface coverage. We isolate the behavioral differences between paper and plastic substrates during application. Production managers, packaging engineers, and designers will gain the evaluation criteria necessary to succeed. You will learn to specify the correct foil formulation. We will help you mitigate adhesion risks and ensure highly scalable print runs.
Formulation matters: Not all pigment foils are universal; formulations must be strictly matched to substrate surface energy and porosity.
Opacity vs. Detail: Achieving solid white coverage often requires balancing die temperature and dwell time, which can compromise ultra-fine typography if not properly managed.
Substrate constraints: Paper applications require foils formulated for texture bridging, while plastic applications demand low-temperature release to prevent substrate distortion.
Testing is non-negotiable: Pre-production dyne testing (for plastics) and tape-peel tests are mandatory for verifying long-term adhesion and scratch resistance.
You must understand the distinct mechanics of your chosen medium to optimize production. Unlike metallic variants utilizing aluminum layers for reflectivity, these materials rely entirely on flat color layers. They do not reflect light in a mirror-like fashion. Instead, they deposit a solid, painted look directly onto the substrate. Many production teams choose pigment hot stamping foil over standard liquid inks for several operational benefits. The application cures instantly upon release. You face zero dry time. You also eliminate VOC emissions from your production floor entirely. This simplifies environmental compliance and removes the need for heavy ventilation infrastructure.
Screen printing remains a common default for white coverage. However, it presents distinct operational hurdles. Screen setups take considerable time. Throughput speeds remain relatively slow compared to stamping presses. When we evaluate opacity levels, the contrast becomes clear. A high-quality foil delivers a 100% opaque, single-pass hit. It blocks out the darkest background colors immediately. Standard flexo or offset white cannot achieve this in one pass. They require multiple bumps to prevent substrate show-through. Each additional bump increases the risk of registration errors.
Print Method Comparison Chart | |||
Evaluation Metric | Hot Stamping | Screen Printing | Standard Flexo |
|---|---|---|---|
Opacity (Single Pass) | 100% Opaque | Moderate to High | Low (Requires bumps) |
Drying Time | Instant (Zero) | Requires drying tunnels | Requires UV or IR curing |
VOC Emissions | None | High (Solvent dependent) | Moderate |
Edge Acuity | Extremely sharp | Can suffer mesh marks | Prone to dot gain |
You should not force this solution into every scenario. Identify the constraints early. Highly stretchable substrates pose a severe risk. Rigid color layers will crack if the substrate stretches significantly post-application. You must also avoid this method for designs requiring soft gradients. The process is binary. The color layer either transfers completely or it does not transfer at all. Photographic blends and fade-outs demand traditional dot-based printing techniques instead.
Paper substrates present a massive range of surface textures. You cannot use a universal adhesive sizing for all papers. Coated stocks behave very differently than uncoated fibrous materials. Matte and gloss coated papers feature sealed surfaces. They accept standard adhesive sizing easily. The smooth surface allows for uniform heat transfer and immediate anchoring. You rarely struggle with coverage consistency on these sealed stocks.
Uncoated and heavily textured stocks present a steeper challenge. Premium wine labels and rough book covers fall into this category. These materials demand "easy release" formulations. The color layer must release from the carrier quickly to bridge the tiny gaps between paper fibers. If you use a standard release formulation here, you will overcompensate. Operators typically increase machine pressure to force the adhesive into the rough texture. This excessive pressure crushes the paper fibers. It causes unwanted embossing on the reverse side of the sheet. Specifying a tailored paper pigment foil prevents this destructive compensation.
You must carefully manage the relationship between die pressure and adhesive spread. Porous surfaces absorb adhesives differently than sealed ones. If you apply too much pressure, the heat liquifies the adhesive aggressively. It squeezes out past the edges of the die. This creates fuzzy, blurred edges around your typography. We call this edge bleed. Conversely, insufficient pressure fails to activate the adhesive fully. The color layer sits loosely on top of the paper fibers. It will inevitably flake off during handling or shipping.
Achieving pinhole-free coverage on large blocks of color is notoriously difficult. Rough paper naturally traps microscopic air pockets under the die. These air pockets block the adhesive from touching the paper. This results in tiny black dots showing through the white layer. You need specific tooling adjustments to compensate. Operators often use slightly crowned dies to push trapped air outward from the center. You must also select a high-density opaque stamping foil designed specifically to mask heavy textures without trapping air.
Plastic substrates lack the porous nature of paper. The adhesive has no fibers to grab onto. It must bond strictly at a chemical level. This fundamental difference requires a completely different approach to material selection and surface preparation.
Common plastic substrates natively repel liquids and adhesives. PET, PVC, PE, and PP possess low surface energy in their raw state. You must treat these surfaces before decorating them. Corona treatment remains the industry standard. It bombards the plastic with a high-voltage electrical discharge. This temporarily alters the surface tension. You measure surface energy in dynes. Your plastic must reach a minimum dyne level before application. Aim for 38 to 42 dynes. This range allows the adhesive to anchor permanently. If you attempt to stamp on a 32-dyne surface, the layer will peel off effortlessly.
Plastics present a severe thermal limitation. They feature low heat deflection temperatures. Applying a 150°C brass die to a thin PET film will cause instant damage. The heat melts or warps the substrate irreparably. You must evaluate the thermal threshold of your specific plastic. This necessitates using low-temperature release formulations. A specialized plastic pigment foil operates safely between 100°C and 120°C. These formulations activate their adhesives at lower temperatures to protect the structural integrity of the plastic packaging.
Rigid plastic containers handle standard adhesives well. Flexible packaging requires specialized chemistry. Squeeze tubes undergo constant physical manipulation. Consumers squeeze, twist, and flatten them daily. A rigid adhesive will shatter under this stress. The white color block will crack and fall away. You must specify elastic formulations for these applications. The adhesive and the color layer must possess enough flexibility to stretch alongside the plastic wall without breaking.
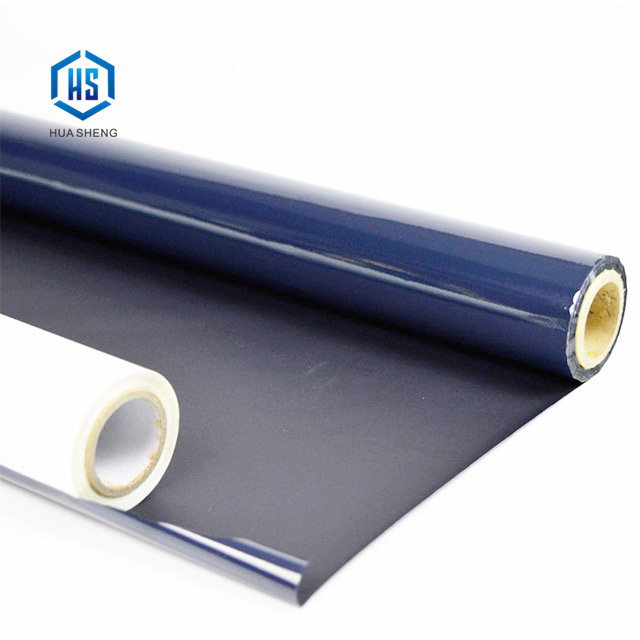
Theoretical compatibility means nothing without precise mechanical execution. The press room floor introduces variables you must control. Your choice of tooling directly impacts your ability to hold a solid white layer.
Your die material dictates thermal stability. Brass offers superior heat retention. It acts as a massive thermal battery. Brass easily maintains a consistent surface temperature during long, high-speed runs. It handles large solid areas without dropping heat. Magnesium offers a different value proposition. It costs less and etches faster. This makes magnesium highly attractive for short runs. However, magnesium loses heat rapidly. If you attempt a large solid area with magnesium, the die temperature will fluctuate. This causes inconsistent opacity across the sheet.
Die Material Comparison | |||
Material | Heat Retention | Run Suitability | Detail Capability |
|---|---|---|---|
Brass | Excellent | Long runs, large areas | Very High |
Magnesium | Poor | Short runs, small hits | Moderate |
Every operator must balance three interconnected variables. We call this the operational triangle. You manipulate temperature, pressure, and dwell time simultaneously. If you face a stubborn substrate, you might increase dwell time. A longer dwell time forces the adhesive deeper into the surface. However, this extended contact transfers more heat overall. To prevent edge spread or substrate warping, you must drop the machine temperature to offset the longer dwell time. Changing one variable always requires adjusting the other two.
Plastics generate significant static electricity as they move through a press. This static charge acts like a magnet. It attracts airborne dust particles directly to the print area. A dust particle sitting on the substrate creates a physical barrier. The die hits the dust particle instead of the plastic. This leaves a visible pinhole in your solid white block. You must actively neutralize the static charge. Install ionizing air bars directly over the substrate web before the stamping station. This eliminates the static field and blows away existing dust.
Choosing the right vendor ensures consistent production quality. You cannot rely on trial and error during a live run. Establish strict qualification criteria before you purchase bulk rolls. A rigorous evaluation process separates capable partners from unreliable vendors.
Demand complete transparency regarding chemical makeup. Ask your supplier for Material Safety Data Sheets (MSDS). Verify RoHS compliance for electronic packaging. If you print on food or cosmetic packaging, the stakes are higher. You must demand heavy-metal-free certifications. Certain older white pigments contained heavy metals to improve opacity. Modern compliant formulations achieve the same opacity safely. Ensure your vendor provides updated documentation for every batch.
Never bypass physical testing. Request a narrow sample roll and run it on your actual production equipment. Follow this specific testing checklist to validate performance.
The Tape Test: Stamp a solid block onto your final substrate. Wait twenty-four hours for the adhesive to cure fully. Score a cross-hatch pattern into the stamped area using a sharp blade. Apply high-tack testing tape over the grid. Rip the tape off rapidly at a 180-degree angle. Count the removed squares. Zero removal indicates a perfect bond.
The Scratch Test: Evaluate scuff resistance mechanically. Matte finishes historically suffer from easy marking. Drag a stylus or a standardized scuff-tester across the surface. A premium white pigment foil must survive standard abrasive contact without exposing the substrate beneath.
Edge Acuity Review: Do not rely on the naked eye. Inspect the stamped edges under a 10x magnification loupe. Look closely for tiny adhesive halos. Check the inside loops of small letters. Ensure the material releases cleanly without dragging.
A supplier might pass the technical tests but fail at scale. Evaluate their operational capacity before committing. Check their standard lead times. Understand their custom color matching capabilities. You might need a specific brand white eventually. Ask about batch-to-batch consistency guarantees. A reputable pigment foil manufacturer utilizes strict spectrophotometer controls. They ensure roll number one hundred matches roll number one exactly. Avoid suppliers who cannot provide written consistency tolerances.
Achieving flawless opaque white coverage requires strict attention to chemistry. You must match the specific adhesive formulation to the physical realities of your substrate. Coated papers, rough uncoated stocks, and slick plastics all demand entirely different release mechanisms. Ignoring these differences guarantees production failures. Establish a rigid pre-production proofing process immediately. Use production-grade brass dies during your testing phase to mimic real-world thermal conditions. Never scale to high-volume runs based on assumptions. We recommend consulting directly with a technical specialist. Request targeted sample rolls formulated for your exact substrate and application equipment to guarantee success.
A: The core difference lies in their structural composition. Metallic options utilize a vacuum-metallized aluminum layer to reflect light, creating a shiny, mirror-like finish. Pigment options utilize flat, solid color layers instead of aluminum. This structural difference results in a completely opaque, matte or gloss painted appearance rather than a reflective metal shine.
A: Flaking occurs for three primary reasons. First, your plastic surface energy might be too low, requiring immediate corona treatment. Second, you might be using an incorrect adhesive formulation designed for paper instead of plastic. Third, your die temperature or dwell time could be too low to activate the adhesive properly.
A: Yes, you can overprint certain formulations. Specific printable foils feature a topcoat that readily accepts UV inks and varnishes. However, standard formulations do not support overprinting naturally. You must explicitly specify your need for an overprintable surface during the initial purchasing phase.
A: Yes, it is achievable, though challenging. Fine lines require a specific "tight release" formulation. This prevents the thick color layer from filling in closed letters like 'e' or 'a'. You also must use highly precise, CNC-engraved brass dies to control the thermal transfer perfectly.


